


Updated: 23 April 2026 · Manufacturer recommendations and technology change, but ergonomic fundamentals remain. We update this article regularly – for questions about the fit of specific models, also check osprey.com or deuter.com.
A wrongly adjusted hiking rucksack can turn your tour into torture – whether you're on a day trip or in trekking mode for a multi-day adventure. Proper adjustment isn't rocket science: with just a few minutes of effort, you can distribute the load so that your hips and pelvis carry most of the weight – keeping your shoulders free. In this guide, we'll show you how to determine the right back length, the 5-step workflow for adjustment, what women and children need to consider, and how to master heavier tours without backache.
Why proper adjustment is crucial
The physics behind a well-fitting hiking rucksack are simple: 70-80% of the weight should rest on your hips, only 20-30% on your shoulders. Anyone carrying the load primarily on their shoulders will tire quickly, develop neck tension and become exhausted on the trail.
The limit for total weight: on day trips maximum 10%, on multi-day tours up to 15% of your body weight. Someone weighing 70kg should therefore carry no more than 7-10.5kg – including water, food and equipment.
Finding the right back length
The most important measurement before buying a rucksack is your back length – not your height. Measure the distance between your seventh cervical vertebra (C7) and the top edge of your hip bone:
- Tilt your head forward – the largest protruding vertebra at your neck is C7
- Place your hands on your sides at hip level – your thumbs point to the hip bone
- Measure the distance along your spine with a tape measure
Back length sizes overview
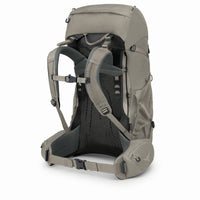
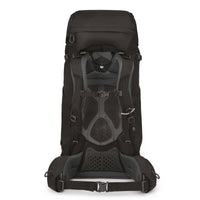
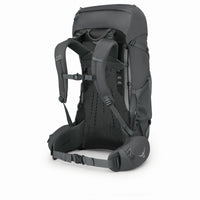
Modern rucksacks often feature an adjustable carrying system that lets you adapt the back length by 5-10cm. This is now standard on high-end models from Osprey or Deuter.
The right volume for your trek
Besides back length, the litre capacity determines the right rucksack. Rules of thumb:
| Trek Type | Volume | Typical Use |
|---|---|---|
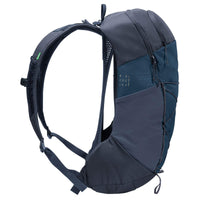
| Half-day hike | 15–20 L | Snacks, jacket, water |
| Day hike | 20–30 L | Extra clothing, first aid, provisions |
| Hut weekend | 30–45 L | Change of clothes, hut sleeping bag |
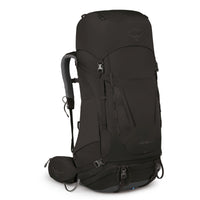
| Multi-day trekking | 45–60 L | Tent, sleeping mat, sleeping pad, stove |
| Expedition & winter | 60–80 L | Winter sleeping bag, gear, food |
Tip: Better to pack a smaller rucksack full than carry a large one half empty. Half-empty rucksacks shift around, the centre of gravity moves and the carrying feel suffers. For undecided buyers: our hiking rucksack collection shows common volumes for comparison.
Women's hiking rucksacks – the differences
Many manufacturers offer models specifically adapted to female anatomy. This is more than marketing – the differences are anatomically based: shorter back length, narrower shoulders, wider hips. A women's rucksack considers this with several details:
- Shorter back panel: fits back lengths usually between 38 and 50cm
- Angled hip fins: follow the shape of the female pelvis
- Conically shaped shoulder straps: run closer to the décolletage, don't chafe the chest
- Softer padding material in the chest area
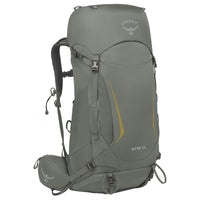
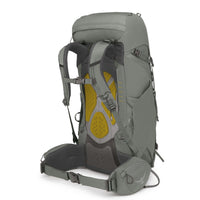
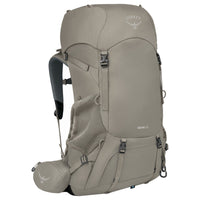
Renowned brands like Osprey (e.g. Osprey Kyte, Mira, Tempest), Deuter (Aircontact SL, Futura SL) or Jack Wolfskin have dedicated women's series. When buying, look for designations "Women's Fit", "WS" or "SL" (slim).
Children's rucksacks – finding the right model
Different rules apply for children, as their musculoskeletal system is still developing. The 10% rule for weight is absolutely binding for children – preferably even less. Other important criteria:
- Short but already adjustable back: grow-with-you principle for 3-5 years of use
- Padded hip belt: transfers load to the pelvis even in children
- Bright colours or reflectors: visibility on the trail
- Maximum volume 10-25L for children between 6 and 12 years
- Integrated rain cover: children's rain covers are often included
In our children's rucksacks section, you'll find models from Jack Wolfskin and other brands in age-appropriate sizes. For toddlers up to 3 years, there are child carriers – such as the famous Osprey Poco.
Adjusting your hiking rucksack – in 5 steps
Now for the adjustment. Important: Pack the rucksack first – then adjust it. You can only feel if everything fits properly under real load. Always work through the 5 steps in this order:
The 5-step workflow
From loose to tight – order matters.
Loosen all straps
Put on the packed rucksack. Completely loosen the hip belt, chest strap, shoulder straps and load adjuster straps – basically to "zero".
Position the hip belt
The hip fins sit CENTRALLY on the hip bone – not at the waist. Close the belt and tighten firmly, but don't let it cut in. 70-80% of the weight rests here.
Tighten shoulder straps
Now tighten the shoulder straps until they rest directly on your shoulders. The transition from strap to rucksack should be between your shoulder blades – not at your neck or below the shoulder blades.
Close chest strap
Only tighten slightly – it stabilises the fit but shouldn't restrict breathing. Adjust height so it sits about 2-3 fingers below the collarbones.
Fine-tune load adjuster straps
The short straps at the top of the shoulder straps pull the rucksack closer to your body. Tighten at approximately 45-degree angle – nothing will wobble anymore, even in rough terrain.
Common mistake: Many people tighten the shoulder straps first, then the hip belt. This shifts the load to the shoulders – exactly what we DON'T want. Always proceed in order 1 → 5.
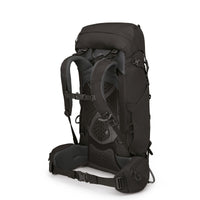
Packing properly – weight distribution in the rucksack
Even a perfectly adjusted rucksack suffers if you pack it wrongly. Rule of thumb: Heavy items close to your back, light items outwards and downwards. Three zones:
Tips for pain-free hiking
Check weight: Weigh your gear before the tour. Day hikes maximum 10% of body weight, multi-day up to 15%. Refill water en route instead of carrying several litres – every litre of water saves 1kg on your back.
Micro-movements on the go: Every few minutes, circle your shoulders slightly, shift weight minimally, stretch while walking. This keeps muscles loose and prevents tension.
Strengthen beforehand: Just 10 minutes daily training helps enormously: planks for the core, shoulder circles, chest muscle stretches. Especially on long trekking tours, this makes the difference between fun and suffering.
Plan breaks: Every 60-90 minutes, take off the rucksack, loosen shoulders, breathe deeply. Your back will thank you – and you'll enjoy the scenery more consciously.
Which hiking rucksack suits you?
Depending on your intended use, we recommend these types – with our category selection you'll find the right model:
- Day hiking / walking: Hiking rucksacks in 20-30L
- Multi-day trekking: Trekking rucksacks from 45L with stability frame
- Alpine mountain tours: Alpine rucksacks with ice axe attachment
- Mountain bike tours: Bike rucksacks with hydration system
- Weekend travel: Travel rucksacks – hybrid use for city trips and hut hiking
- Children from 6: Children's rucksacks
More tips on packing and trip planning can be found in our guides Pack rucksack properly, Ultralight trekking and Bikepacking packlist.
Frequently asked questions about hiking rucksacks
How do I adjust a hiking rucksack properly?
In 5 steps: 1. Loosen all straps, 2. Tighten hip belt firmly on hip bone, 3. Tighten shoulder straps, 4. Close chest strap lightly, 5. Tighten load adjuster straps. Important: 70-80% of weight on hips, only 20-30% on shoulders.
How do I measure the correct back length?
Measure the distance between your seventh cervical vertebra (C7 – the largest protruding vertebra at your neck) and the top edge of your hip bone (place thumbs on sides at hip level). Under 45cm = size S, 45-52cm = M, over 52cm = L.
How much should my hiking rucksack weigh?
On day hikes maximum 10%, on multi-day tours up to 15% of your own body weight. A 70kg person should therefore carry no more than 7-10.5kg – including water and food.
Do women need a special hiking rucksack?
Women's rucksacks have a shorter back panel, more angled hip fins and conically shaped shoulder straps – this fits better with female anatomy. Manufacturer designations: "Women's Fit", "WS" or "SL".
How do I pack the rucksack correctly?
Heavy items close to your back at shoulder blade height (water, tent, stove), light items at bottom as padding (sleeping bag) and top/outside for quick access (rain jacket, snacks, first aid).
What do I do if the rucksack presses or chafes?
Usually it's due to incorrect adjustment: hip belt sits too high (on waist instead of hip bone) or shoulders carry too much load. Loosen all straps, readjust in order 1-5. If it continues chafing: back length doesn't fit – change model or adjust carrying system.
Conclusion
A perfectly adjusted hiking rucksack makes the difference between an enjoyable tour and a painful march. With the right back length, appropriate volume and the 5-step guide, you'll distribute the load optimally on your body, prevent back pain and shoulder tension, and stay fit even after 6 hours on the trail. Off to your next adventure – and if you don't yet have a suitable rucksack, you'll find the right size for any tour in our hiking rucksack category.